Showing posts with label button placement. Show all posts

Tuesday, October 20, 2020

Reflections on Wearing Braces: National Suspenders Day 2020

Today is National Suspenders Day. I’d like to share some current reflections on braces. I’ve been intentionally wearing braces for over 20 years now, starting in my early 20s. I’ve written before about how I got started, and why I wear them. Essentially, I wear braces for their both their comfort and functionality – they allow my pants to be loose-fitting and as such, are held in place with braces.

I wear braces almost every day, even while working from home. I’ve found it helps my mind get into work mode when I dress as I would for the office. I’m sitting at a desk for most of the day, and the loose waistline allows me to breathe in and out without having a restricted belt around my midsection. It is so comfortable. And when I stand up, my waistline stays at its proper place.

As I reflect on this, braces are the perfect complement to the clothes I wear for work. They allow me to display my personality through different colors and styles, add a vintage aspect, and are a distinctive yet understated accessory. I've branched out from only black and navy suits and pants to browns and greys as well. This also allows me to coordinate different colors of braces. When people notice my braces they comment that the look is so dapper and classic. I take it as a genuine compliment on my style. I enjoy these conversations!

I've discovered that people appreciate in particular when I wear the color brown. Most men these days only wear navy or black suits, not brown. As a result, when I wear brown, I stand out. Brown is not worn that much anymore, so when people see me wearing brown, they appreciate it. I recently bought a pair of brown braces that matches my brown pants. The braces are Y-back inverse-V braces very similar to the gentlemen below:

Ad for Pioneer braces - transport me into these beautiful high-rise pants and braces!

I was looking recently at vintage photographs, in particular men wearing braces in the photographs. I noticed that their front brace tabs were quite spread out. I did some more perusing of old photographs and noticed that the placement was usually quite wide: one button directly above the main pleat (which is what I’ve always advocated), and the other button directly above the side seam of the pants. Here's some examples:

Exterior outer buttons are at the side seam
 

Exterior outer buttons are at the side seam

The man wearing the hat has his outer button above the side seam

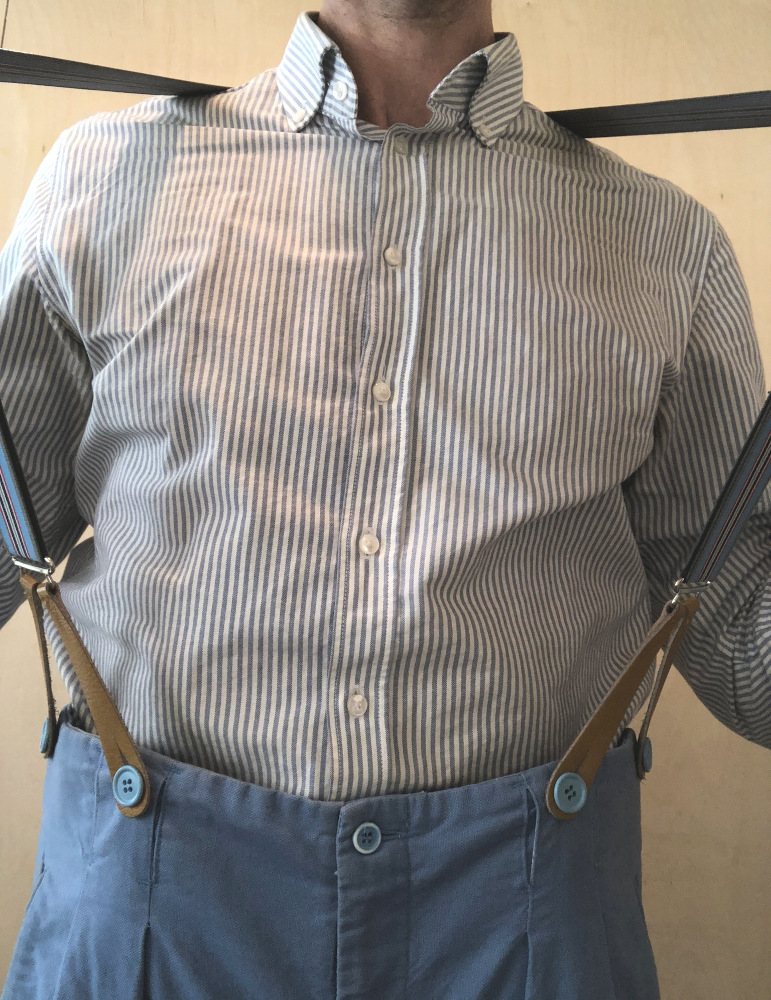
When I inspected my button placement I noticed that the distance between the main pleat and side seam was another inch or so past my usual spacing of 3.5 inches. I was curious and wanted to try out this more vintage button placement. I sewed buttons directly above the side pant seam and attached my braces. 

On the particular pair of braces I chose, the brace tabs fanned out very nicely (see photo below). The waistline did not bulge but rather floated gently with the support of the spread-out brace tabs. I felt the outer brace tabs tug gently throughout the day, which kept my side seam straight. This was more noticeable when I sat down and felt a slight tug at the side seams.

The side seam on the left and
main pleat on the right

I have an ordinary build - my waistline is not overly large, so spanning the main seam and side seam with the brace tabs works well. But I realize brace tabs come in different sizes and have different spacing, so it may not work on narrower tabs.

I decided to wear this pair of pants to a family dinner recently. I matched the high-rise pants with the stripped Y-back braces, a blue dress shirt, and a knitted burgundy cardigan for warmth. Travelling there I was comfortable, but once I got inside the home it started to warm up; especially in the kitchen with the oven heat. I took off my cardigan and displayed my stripped braces and high-rise pants. People noticed, but things carried on, as everyone knows that I wear my pants with braces.

View from the front

I had to get up from the table a few times, and every time I stood up my braces were there to hold my pants in place. As I rose and bent forward I noticed that the outer brace buttons tugged my side seam more than the the previous button position. It was reassuring to me as it reminded me that my brace tabs were keeping the side seam straight and taut.

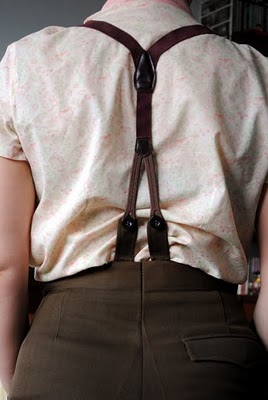
View of the rear

I enjoyed the dinner and the rest of the evening without thinking about my pants. It wasn’t until it was time to leave that I put the cardigan back on. Reflecting back, this must have been how men wore suit jackets and cardigans in the 1920s to 40’s. They would take off their outer layer when they got inside, and then put it back on when it was time to go out. Men had their braces shown and it was commonplace to see braces around the home or office. In fact, it added to the man's whole outfit with stylish colors and designs.

As I take a look at what people are wearing these days, I notice that vintage styles are returning. I’m glad to be contributing my part by wearing braces! I plan on wearing braces for the rest of my life.

Wednesday, September 20, 2017

Return of the Light Blue Pants

When I was a boy my parents bought me a pair of light blue dress pants. This was unlike any pair of pants I'd worn before, as the pants came with suspenders in the same color. The pants were high-rise, which was the trend at the time, and these pants came up just above my belly button. The pants had no waistband, rather the fabric came up all the way and just stopped. I’ve since learned this style is called ‘Hollywood Waist’. As a thin boy, the pants required the use of suspenders to hold them up, which is likely why they were included. The suspenders were Y-back and clipped-on to the hollywood waist. It made sense why there was no waistband - the pants were intended to be worn only with suspenders.

I remember wearing this outfit often - to holiday dinners, church, and weddings, especially in the summer time. I’d wear a checkered shirt or for more formal occasions, a white dress shirt. There was no suit jacket – just the pants and suspenders. I felt stylish in my pants and suspenders.

I remember other boys wore pants and suspenders as well. It was quite common back then.

Jump ahead 20 years, while hunting through a thrift store I came across a strikingly similar pair of light blue dress pants. This time in an adult size and without suspenders. When I saw them, my childhood memories of wearing the blue pants immediately came rushing to mind.

I was so surprised! I must have been staring at the pants too long, as the lady working in that department came by to ask how I was doing. I told her I used to wear a pair of pants similar to this when I was young and it was bringing back memories. She smiled and suggested I purchase them to relive my childhood. 

I agreed and shared my memories of wearing high-rise pants as a child with suspenders. She replied that she loved the look and that I should do the same with this pair. But, I said, this time I would wear the pants with button-on braces, instead of clip-on suspenders.

A few days later I removed the belt loops and sewed suspender buttons on the waistline. I sewed the buttons on the outside of the waistband to fit the vintage style of the pants. Buttons on the outside is very traditional, and I wanted to show the details of the suspender buttons against the brace tabs. Here’s a close-up of the brace tabs and exterior suspender buttons.

Here's another close-up with a different shirt:

Exterior suspender buttons against the brown brace tabs

The diamond pattern in the shirt complement the diamond braces.

Rear shot of braces

I love the look and feel of the pants; they are vintage and make a statement! It's the closest thing I can get to reliving my childhood!

Later this year I found another pair of light blue, high-waisted denim pants at a thrift store. They had a vintage design at the waist - no belt loops. Rather the pant fabric came up to top of the pants. These were again the Hollywood waist. They again reminded me of my childhood and wearing suspenders. These pants required suspenders to hold them up, but did not come with buttons, so I sewed them on, this time on the inside of the waistband.

High-waisted, light blue denim pants with braces

Rear shot of high-waisted pants

I bought these stripped Y-back braces long before I had light blue pants. They pair so well and I like the colors - the blue on the braces with the blue in the pants, and the red on the braces with the red in the dress shirt, the white on the braces and the white on the dress shirt. 


A few years later, after enough people had wanted to see the buttons attach at the waist, I decided that these pants would be better with the buttons on the outside of the pants. So I clipped them off and resewed the buttons onto the exterior of the waistline. 

Buttons on the outside

Rear shot of buttons on the outside

I like that people can see my buttons and braces. It's a vintage look that I enjoy and know others do as well.

These pants are larger at the waist, as you can see with the slight fish-tail back feature. Just like the pair of pants I had when I was young, these pants need braces to hold them up.

Evidence that my braces are suspending my loose waistline

Now when I wear either of these blue pants I'm reminded of my childhood, and where my love of high-waisted pants and suspenders all started.


Discussion time:

  • Did you wear suspenders growing up?
  • Do you continue to wear suspenders, or stopped after childhood?

Monday, September 30, 2013

Problems wearing Braces or Suspenders - and how to correct them

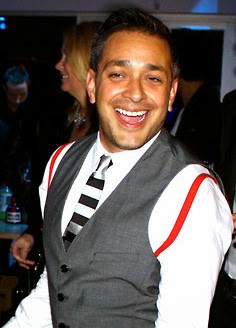
I attended a wedding recently where the groomsmen were wearing suspenders under their vests. This is very stylish, as the suspenders allow for the vest to lie flat, and do not create a bulge where a belt would be, as the vest moves smoothly over the pants. The problem was that when the dancing started, the straps started slipping off the shoulders, out of the arm pockets of the vest, similar to the photo on the right. Not only did the groomsmen have to constantly put their straps back on their shoulders, the suspenders were not holding up their pants.

This is one of the problems with wearing suspenders or braces incorrectly. I say incorrectly, as people are snapping on suspenders more often these days, but are not aware of the correct style. In this post I describe several problems to wearing suspenders or braces incorrectly, and how to fix them:
  • Improper button/clip placement: Brace buttons that are positioned too close to the center seam are uncomfortable and tend to distract from the rest of the outfit. They also do not allow the side seam to be properly supported. The opposite is also true – brace buttons that are positioned to far to the sides do not support the pants and are uncomfortable. For suspenders, people position the clips too close to the center seam, or too far to the side.
  • How to correct it: For braces, the first front button should be half-way between your belly button and the side of your body (hip bone). Use the inseam on the pant leg as a general rule. The second button should be placed about 3-4” along the waistband. This should be near the side seam of the pants. The exact placement depends on your waist size and personal preference, but I’ve found this to be the most comfortable. While we are on button placement, the rear buttons should be placed 2” on either side of the rear center seam for Y-back braces, and 2.5-3” for X-back braces. If you are taller, you should space the braces farther apart. Also, if you have a larger waist (36”+), you should position the braces farther apart. Aim for half way between the center seam and side seam. This will keep your pants level and secure.
    For suspenders, the front clips should be positioned half-way between your belly button and the side seam on your pants. For the rear clips, X-back suspenders should be placed about 2-2.5” from either side of the center seam; Y-back suspenders are positioned directly in the center of the pants.
Proper button placement
Buttons are too close to the center


  • Non-adjustable back-junction: Braces and suspenders are designed to have either an X-Back where the straps cross over each other in the rear, or a Y-Back, where the straps join together into a single strap as it continues down to connect with the pants. The place that the straps meet is called the back-junction. When the junction is fixed in place, it cannot be adjusted to fit your body shape. Taller people require the junction to be positioned higher on the back (but not on the neck), than shorter people. See the first photo below - this should be adjusted down, but it is unable to. When the junction is fixed, the straps are uncomfortable as the junction gets too close to the neck and shoulders, or they straps are constantly falling off the shoulders as the junction is too low.
The back junction should be raised
Non-adjustable back-junction


  • How to correct it: For braces or suspenders that have an adjustable back-junction, simply move the junction to be higher or lower. For braces or suspenders with fixed back-junctions, use some of the material from the hem of the pants to sew in rear-tabs on the back of your pants, forming "brace tabs", see image below.
  • Rear-tabs to raise back junction
    This effectively raises the back junction to reduce the chances of the straps slipping of your shoulders. Historically, men wore braces every day, but did not always have adjustable back junctions. Brace tabs were the common solution to keeping straps from slipping off the shoulders.

  • Faulty clips: Suspender clips eventually fail, and when they do, they can snap off suddenly. The more suspenders are worn, the more chance they will lose their gripping power, especially if the cloth material is thick.
  • How to correct it: Unless you love the colors or patterns of the straps, throw out the suspenders and get a better pair. You should also consider graduating to braces, as buttons popping off are less frequent and do not involve metal objects flying around your body!


The next time you wear suspenders or braces, remember to avoid these problems.

Wednesday, September 8, 2010

Placement of Brace Buttons

Now that we've addressed that braces should be worn with buttons (see previous post), where exactly should the buttons be located?

The placement of buttons along the waistline is critically important to wearing braces. It determines where the brace straps lie and the "line of the pants". In fact, for those who know, you can see when a man is wearing braces even when the braces are covered by a vest or jacket. This is because of the way the pant material drapes (falls) down the legs. Another indication is where the pants meet the shoes. Not convinced? This is best illustrated in a photo. Check out this vintage photograph of this slightly portly gentleman:

Even with a vest on I can tell he is wearing braces by the way his pants lie. The material is generally flush against his torso. If you know where to look you can see two lines that straighten the pant leg. One is over the centre pleat or line of the leg, and the other is to the side. I've highlighted them below:
 
These lines cannot be the result of a belt. Rather, they are caused by a brace button that is anchored at this point along the waistline. By placing the brace button at these locations, the pants lay flush and clean. Going further, I'd expect this gentlemen's braces underneath his vest to be something like this:


I've added a horizontal line for where I think his pant waistline is, and then the brace strap attached to the waistline, giving the visible signs of the pant lines. This gives a perfect drape as the pants fall straight from the waistline to the shoes and look very classy.

Unfortunately the hedge is blocking our view of his shoes. If we could see his shoes we would likely see a slight "break" in the pant materials that is maintained when the man moves. The pant hem touches the brim of the shoes without having excess materials at the bottom of the leg. This can only be achieved if the pants maintain their same position, relative to the body. And that can only be achieved with braces. If both of these are present, you can be sure the man is wearing braces. These are the sure signs that a man is wearing braces. To the trained eye, you can confidently say this man is wearing braces.

I've had people stare at my pants with their clean drape, with the pants falling gently over the shoes with no excess materials. When they don't see a belt, they ask me how my pants stay up. I'm ever so happy to reveal my secret: I pull back my suit jacket to reveal my braces and the clean lines that are create by braces and the proper button placements.

Therefore, when wearing braces, it is critical to know where to place the buttons to achieve the proper drape. Buttons that are too close to the mid-section are uncomfortable and get in the way. If the buttons are too far apart they do not adequately support the drape or pant lines. This is true for both the front and back of the pants.

Where to place brace buttons
Alan Flusser points out that there should be four buttons at the front: one button over 
each of the main pleats of the pants (inner buttons), and the other two just forward of the side seam (outer buttons). Always start with the main pleat for the inner button, as this is where you will achieve the proper drape and a clean line on the pants. It doesn't matter if it's pleated pants or flat front, there will always be a line that should be straight. The button over the main line/pleat will anchor the pants and create the perfect drape. All tuxedos are made this way to have a crisp, straight line.

Moving to the outer buttons at the front, the placement depends on the width of the brace tabs and the size of the wearer. Some inverse-V tabs are narrower, while some inverse-U tabs are wider (more on this below). I've found that when I place the buttons 3 to 4 inches from the button at the pleat to the next button, this accommodates most brace tabs and is comfortable and provides superior support. As for waist size, for portly individuals, I'd recommend a wider placement of 4 or 4.5 inches apart to provide more surface area on the waistline.

Notice the button placement at the waistline: inner button above
the main seam and outer button about 3-4 inches apart.
This achieves a nice drape of the pants

Over the years I've worn braces with button placement at various positions along the waistband. I've learned that when there's a centre pleat, the inner buttons should be directly overtop to ensure this line stays taut. However, if the pants are more casual, such as with corduroy or jeans, the buttons can be shifted to the side by half to one inch. I have a pair of corduroy pants with buttons placed directly over the side seam and then 4.25 inches forward for the inner buttons. This means that the inner buttons are not directly over the centre of my pant leg, but that's fine, the pants are sufficiently supported. I find the brace straps shift slightly to the side of my chest and sit comfortably.
 

In  the back, there should be two buttons regardless of if you are wearing Y-back and X-back style braces. The buttons should be equidistant from the center of the fork of the braces, so it falls naturally. Here it depends on the style of braces you plan to wear – Y-back braces require buttons closer together (about 1.5 inch on each side of the middle seam). While buttons for X-back braces should be spaced a little farther apart. I’ve found that 2-3 inches on each side of middle seam is comfortable. If you happen to have 4 buttons with X-back braces (such as those illustrated below), then they should be farther apart.


Width between buttons
One common beginner mistake I see often is front buttons that are placed to close together (ie, less than 3 inches together). The placement of the buttons in the front of the pants is important to supporting the line of the pants. Let's review these two photos:

The one on the left has the buttons too close together, in addition to being too close to the centre of the pants. The one on the right has the buttons placed too far to the side, which supports the side seam but the main pleat and line will not be crisp. Aim for balance and support of the pants by positioning the buttons in between these 2 positions. This highlights the important of placing the front buttons on the main seam followed by the side seam. The placement of these buttons on the pants below could be improved by aligning them up with the front pleat.

Buttons should be aligned with the front seam,
generally with the pleat, marked by the red dots
If you are wearing military or regal apparel with a solid strip down the side of the pants, you may choose to support the side seam at the expense of the front seam. You may also be able to support both the main and side seam with certain the braces, depending on the size of the waistband and size of the brace tabs, such as in this photo:

When wearing braces with inverse-V tabs, if the button placement is improper, one tab may curve out from the waist. This looks strange and gets caught on things. I've circled an example in this photo below:


It is for this reason that, historically, inverse-V tab braces were made with one tab longer than the other, by about half an inch. The tabs that connect to buttons closer to the centre were longer than the tabs that were to the side seam to address this issue. This is one way to identify if inverse-V braces are vintage and more historically accurate.
 
Note, this problem does not arise with inverse-U tabs as the brace strap glides along the U-tab as it's not fixed in position.
 
Having worn braces for decades now, my preference is to have the front buttons placed as far apart as practical. I always start with the inner buttons above the main seam and then the outer buttons along the side seam. This works out to the buttons being about 4 to 4.5 inches apart for how I like it. This provides superior coverage over the front of the waistline.

I have a pair of grey high-rise pants with buttons above the main seam and above the side seam. When I wear inverse-U brace tabs, the straps slide comfortably along with my body's movement. With inverse-V brace tabs, the straps keep my waistline in line and tight.

 
What if you are wearing clip-on suspenders - where do you place the clip? This is precisely the problem with clip-on suspenders - they do not adequately support the pants! You must compromise and place the clips either on the main seam or the the middle between the main seam and side seam. Try a number of locations and see what feels most comfortable for you.


Clip placement on the back
Just as the placement of the buttons on the front is important, it is even more important on the back. This is generally the place where newbie suspender-wearers get confused, as they will likely be wearing X-back style, and attach the clips either too close together or too far apart on the waistline:

1. If the buttons are too close together, you can get a wedgie.
2. If the buttons are too far along the pant waist, the pants will not be supported properly and will be uncomfortable when rotating.

Also, if the clips are too far apart, you may cause the waistline to bulge outward, ruining the flat line.

Therefore, it is critical that you determine the right balance for the rear buttons along the waistline. They should be equidistant from the center of the rear seam, but not too far that they create a bulge out. This exact distance depends on the size of the individual, the position of the back junction, and length of the back straps, so this will vary by suspenders and braces. Here is an example of appropriate distance of the straps at the rear:


Belt Loops
Pants or skirts to be worn with braces should not accommodate a belt and so should have no belt loops. More to the point, to be historically authentic, belt loops should be removed, if you will be wearing braces.  
 
Roominess at the waistline
Pants or skirts to be worn with braces should be a little larger at the waist so that they are actually "suspended" from the shoulders. This achieves a very comfortable style.

The skirt on the right is too large
around the waist; on the left is
perfect size.

The front side of the skirt from the left picture displays
the correct waist size, button placement and suspension
(unfortunately the brace material is deteriorating)
 
I understand that the majority of suit pants and skirts are made ready to wear, and the majority of society does not wear braces. As such, the majority of pants and skirts come with belt loops, and so people keep the belt loops on when wearing braces (even with buttons). However, if you are to be historically and functionally correct, the belt loops should be removed. Think of it like wearing a cuff-link shirt with no cuff-links – you know something’s missing. 

Here's a example of how not to wear braces. Not only does he have belt loops, he also has poor button placement - the buttons are not aligned with the pleats and are too close to the center.
Wearing belts and braces at the same time - biggest newbie blunder
Pants and skirts to be worn with braces should not be worn with a belt. You don’t need both a belt and braces to perform the same function of holding up your pants or skirt. There is redundancy here, in addition to looking bad. Therefore, the wearer must decide how to wear the pants – with braces or with a belt.
 
To conclude, if there is one area that separates newbie brace wearers from seasoned veterans, it is in button placement. An expert brace wearer can tell the moment they see someone wearing braces if they are worn correct or not. So take note of these important details for the next time you sew on buttons or wear braces.

Discussion time:
  • Where do you find button placement to be most comfortable?
  • Have you noticed vintage photographs and wondered why the gentleman's pants are staying up and why they have such crisp, clean pant lines?
  • Do you prefer buttons on the inside or outside?
  • Do you find your buttons are popping off?
  • Have any humorous stories of buttons popping off?

Note: all photos are used solely for non-commercial use and to illustrate braces in fashion. No plagiarism is intended.